
Get your matrix running in minutes
Everything you need to flash the board and pair it with Matrix Studio. No soldering — just plug, flash, and connect.
Purchase everything you'll need to get up and running
Driver boardAmazon
Waveshare ESP32-S3-RGB-Matrix driver board with the HUB75 connector.
View on AmazonLED matrix panelAmazon
64×32 HUB75 RGB LED matrix panel — 4mm pitch (P4), 1/16 scan, standard IDC ribbon.
View on AmazonM3 mounting boltsAmazon
M3-0.5 × 8mm stainless Phillips machine bolts for fastening the 3D-printed housing together.
View on AmazonHave a 3D printer? Make the housing yourself
3D-print housing (STL)
Printable enclosure for the 64×32 panel and the Waveshare driver board. Download, unzip, and send the STL files to your slicer.
Matrix housing · 3DPRINT
STL · zipped
What you need
- Waveshare ESP32-S3-RGB-Matrix driver board — the board with the HUB75 connector
- 64×32 HUB75 RGB LED matrix panel — 1/16 scan, HUB75 connector
- USB-C data cable — to flash the board and read its IP
- A 5V power source — panel + board powered together
- WiFi network — your phone/laptop and the board share it
- Arduino IDE 2.x — or the Arduino Web Editor
Wiring
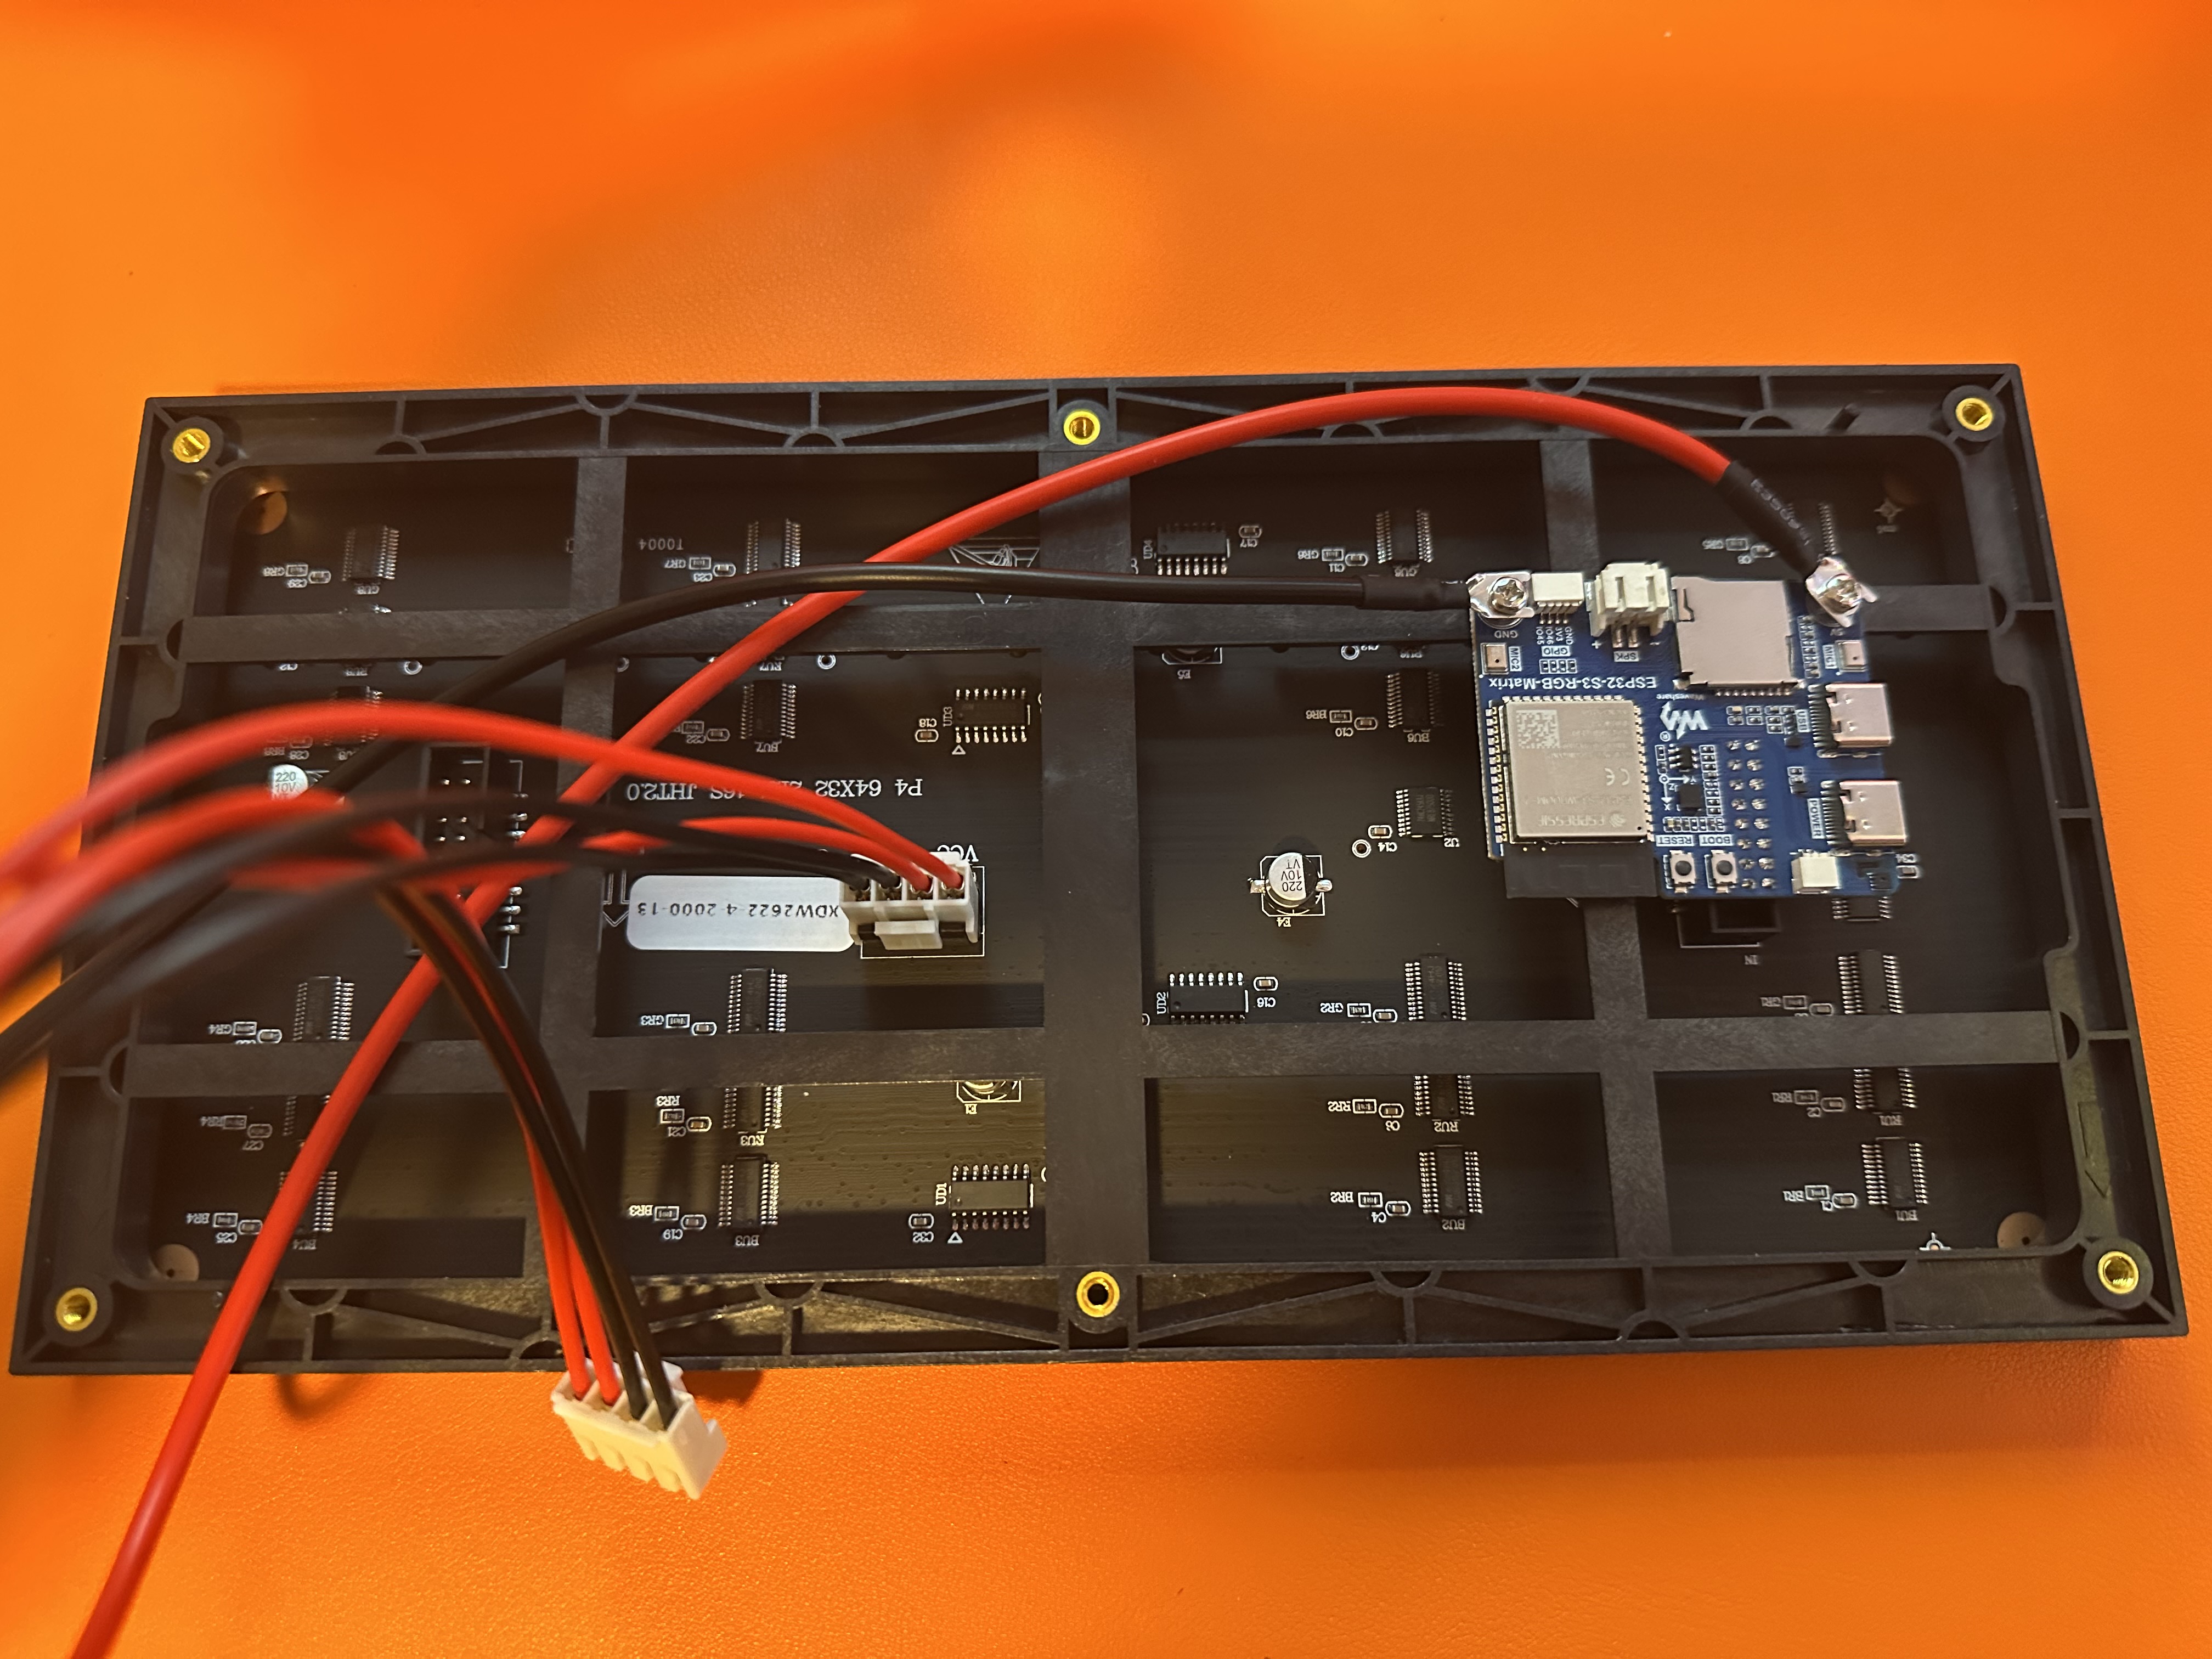
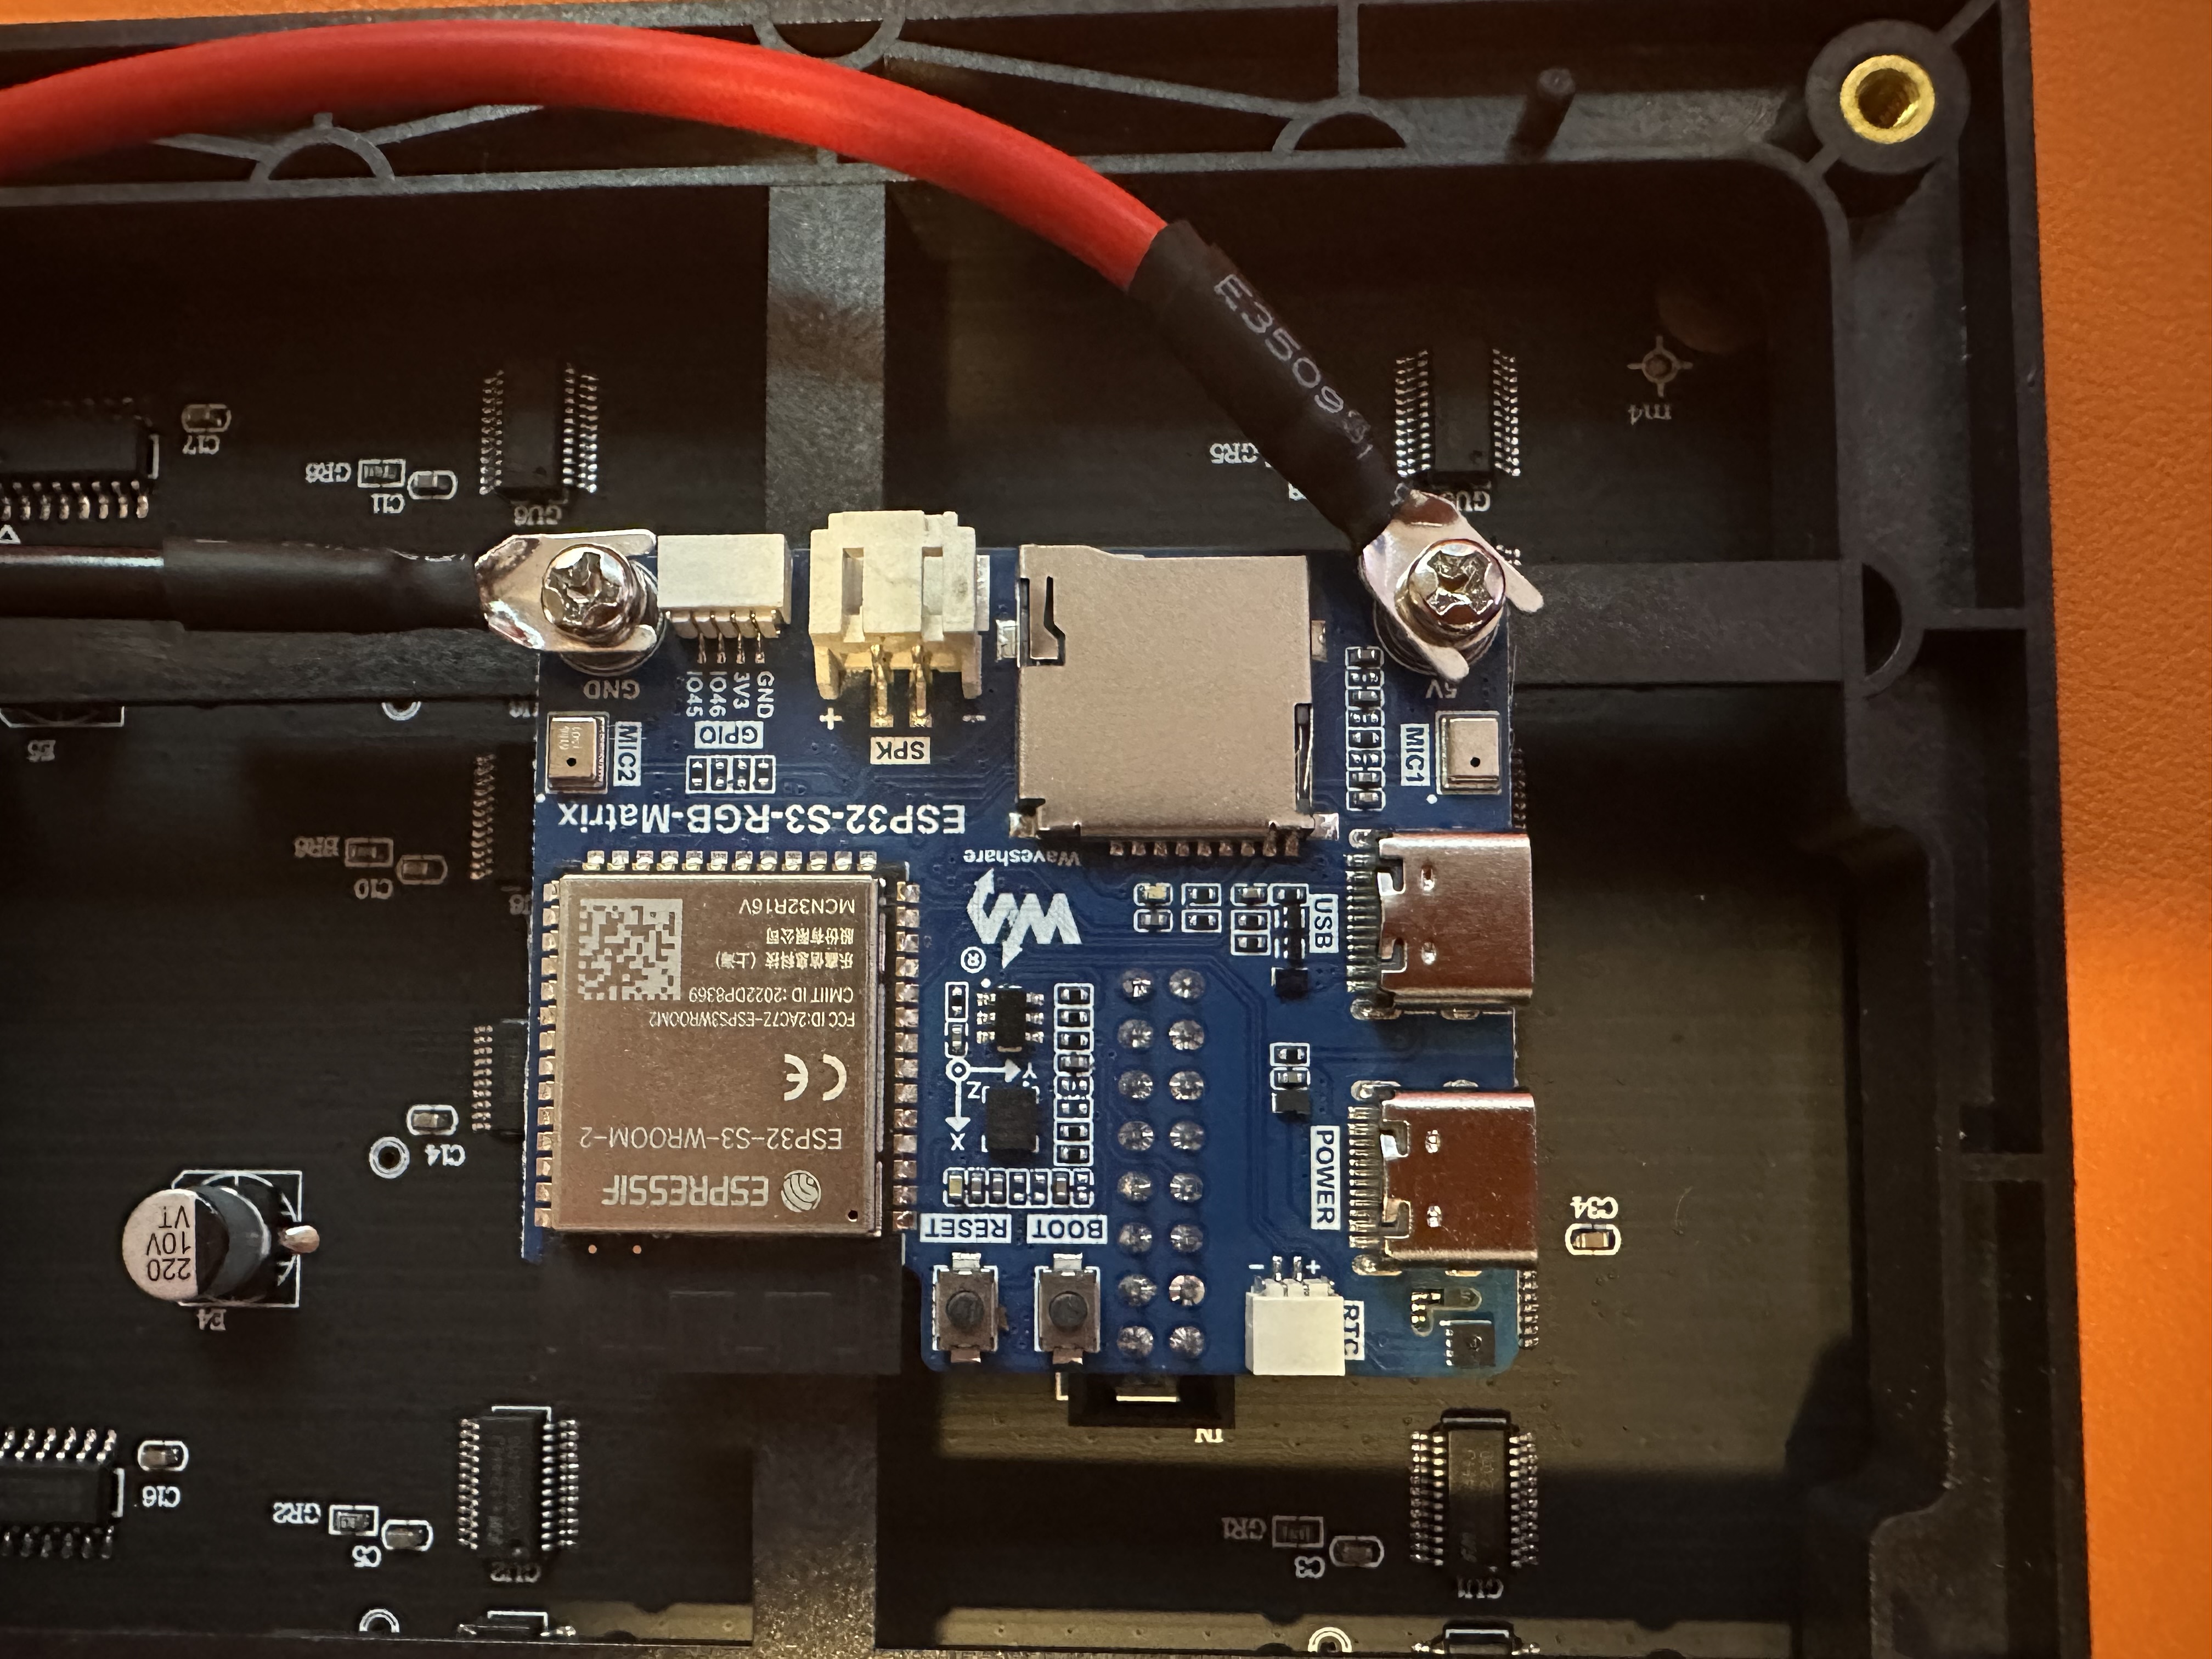
The ESP32 driver board presses straight onto the matrix panel's HUB75 connector, so the two just slot together. Once it's connected, screw down the red power wire and the black ground wire (provided with the matrix panel) to the ESP32's terminal.
Power: red → V+, black → GND on the ESP32 screw terminal.
4-step setup
Download & open the firmware
Got "(1)" in the name? If you downloaded twice, your browser may have saved it as esp32_matrix_ws(1).ino. Delete the old copy (or rename it back to esp32_matrix_ws.ino) before opening — Arduino rejects parentheses in sketch names.
Install libraries
- • Adafruit GFX Library (by Adafruit, version 1.12.6) — required by the matrix driver
- • ESP32 HUB75 LED MATRIX PANEL DMA Display (by mrcodetastic, version 3.0.14)
- • WebSockets (by Markus Sattler, version 2.7.2)
Flash the board
Connect in Matrix Studio
Recommended connection settings
Live dimming — the brightness slider in Studio / Live Scores sends a B<0-255> command to the board over the same WebSocket, so the panel dims in real time without resending frames. The firmware above handles it automatically.